Quick start
0. Introduction
Starting from a new installation, we will configure a user who will be able to make and receive calls via a SIP trunk.
1. Login to the administration interface
The administation interface named wazo-ui is available on port 443 of your engine you can access it through an internet browser.
To log in use the user root and the password that you defined at the beginning of the installation.

2. Use tenants
Meaning of multi-tenant
Wazo is a multi-tenant IPBX, this means that it is possible for a telephony provider to have more than one customer on the same IPBX.
A customer is compartmentalized in his environment and is not aware of users outside his company.
Select your tenant
At the top left of the interface there is a drop-down menu, it allows you to select the tenant that you are configuring.
After installation there are two tenants on your system:
mastersparrow
master tenant is only used by the system.
You don't have to do any configuration inside it !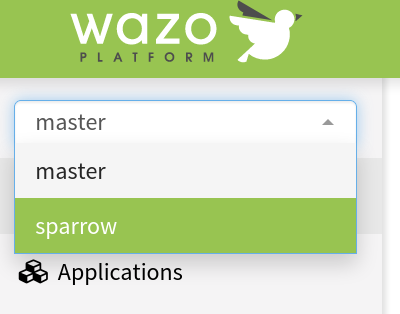
3. Create contexts
In the ⚙️ Advanced > 🔀 Contexts menu we will create 3 contexts:
internalcontext which will contain the system numbersoutgoingcontext which will contain calls to outsideincallcontext which will contain calls from outside
Parameter to be filled in for the internal context:
- Name:
sparrow-internal - Label:
sparrow-internal - Type:
Internal
Parameter to be filled in for the incall context:
- Name:
sparrow-from-extern - Label:
sparrow-from-extern - Type:
Incall
Parameter to be filled in for the outgoing context:
- Name:
sparrow-to-extern - Label:
sparrow-to-extern - Type:
Outcall
Once the contexts are created edit the sparrow-internal context for:
- include the
sparrow-to-externcontext - declare a number range for the users
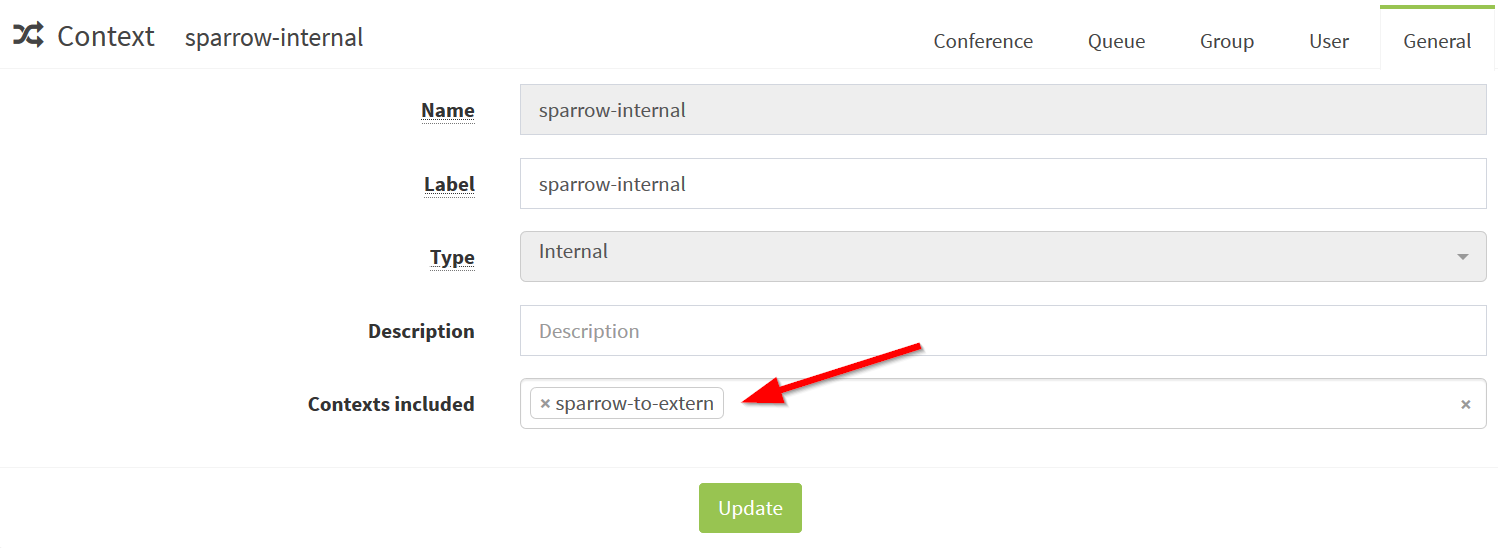

Finally edit the sparrow-from-extern context to add a range for incoming calls.

4. Create a user
A User is a telephone user, he can have one or more lines, one or more DIDs,
one or more devices, he can be assigned call rights, groups …
To create one go to the 👤 User menu and add a user with the following parameters:
- Firstname:
Sparrow - Name:
User - Email:
no@ma.il - Passoword:
secret - Context:
sparrow-internal - Number:
100 - Protocol:
SIP
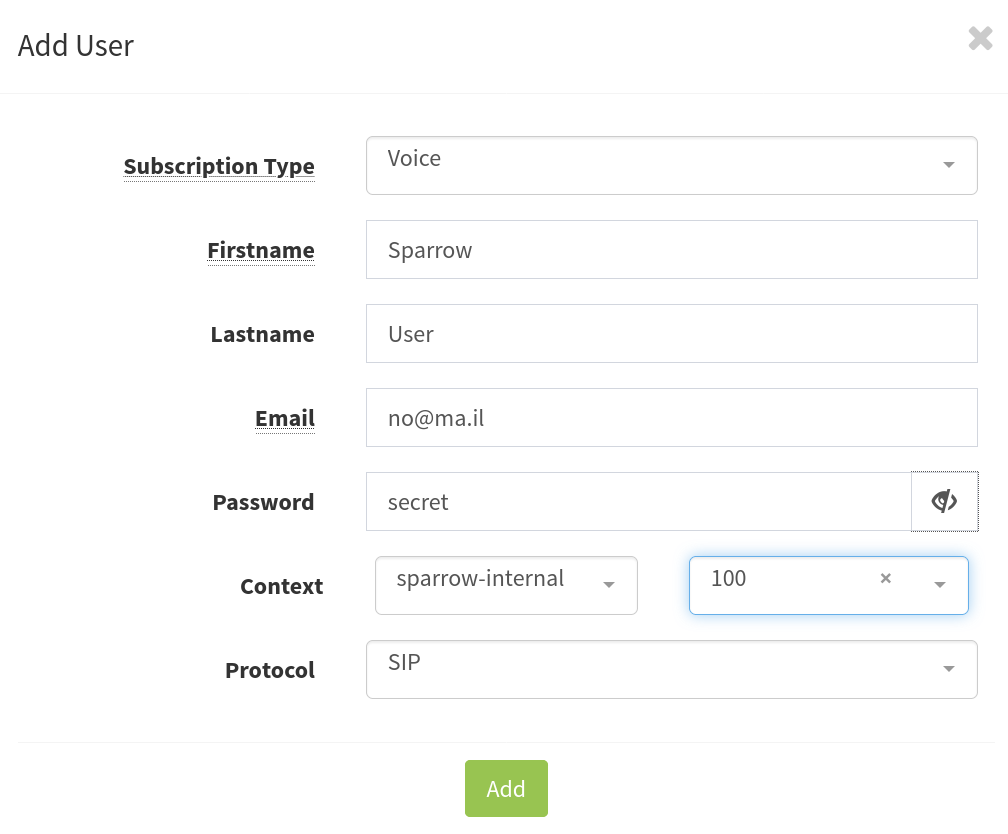
To use this user with a SIP telephone, you can go to the 🔁 line menu, edit your user's line and retriver the auto-generated Username and the Password.
5. Create a SIP trunk
A trunk sip allows a link between 2 systems using the SIP protocol. Operators can enable calls to the public network via a SIP trunk.
To add a SIP trunk go to the 💻 Trunk menu.
The configuration of a SIP trunk is complex and depends on your operator. We won't go into detail about the configuration options of a trunk here.
For the example we are going to create one with minimum parameters:
- Name:
sparrow-trunk - Username:
sparrow-trunk - Host:
Dynamic - Context:
sparrow-from-external.
6. Create a incall rule
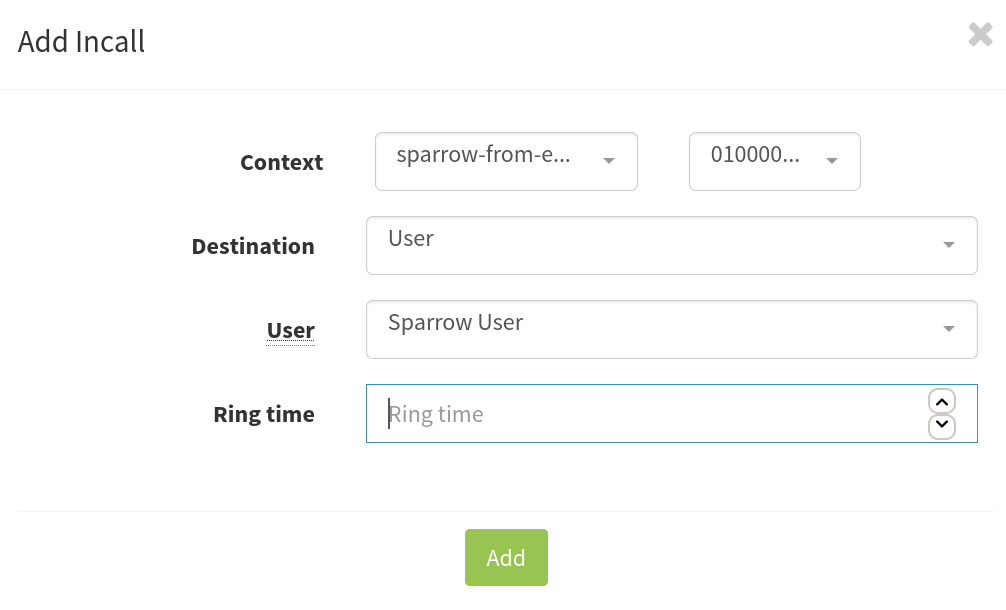
An incall rule makes it possible to associate a number provided by the operator with an internal resource.
To create one go to the ➡️ Incalls menu and add a entry with the following parameters:
- Context:
sparrow-from-extern - Number:
0100000000 - Destination:
User - User:
Sparrow User
7. Create a outcall rule
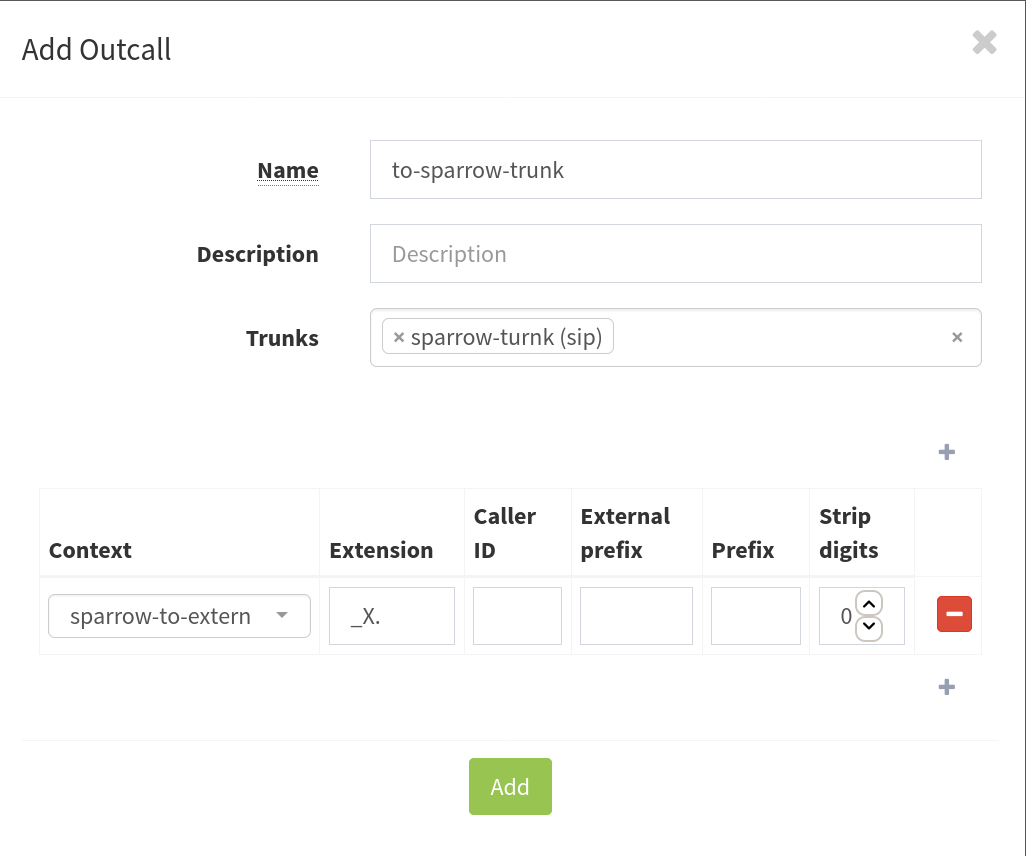
An outgoing call rule allows calls to be routed to the trunk operator.
In our example we will route all the numbers not known by the system to the trunk we have created.
To create a outcall rule go to the ⬅️ Outcalls menu and add a entry with the following parameters:
- Name:
to-sparrow-trunk - Trunks:
sparrow-trunk (sip) - Context:
sparrow-to-extern - Extension:
_X.
8. Conclsion
We have seen how to start from a virgin installation, how to create a user and create an interconnection with an operator.
Feel free to suggest changes or ask questions on github.